
Smart EV charger installation for your home
The charger is only one part of what shapes a home installation. A smart EV charger installation typically takes 2-4 hours, with the cable route and your property’s electrical setup affecting the work involved. The price depends on the installation and is provided after a quote request; cable length, electrical requirements and charger choice all influence the cost.
Choosing a smart EV charger can feel like a balancing act: you want the right connector and cable arrangement, without surprises on installation day. This guide explains what affects installation costs, how tethered and untethered cables differ, and which connector types are commonly used for home charging in the UK.
You’ll also learn what to expect during installation, what can affect its duration, and how product and workmanship warranties differ. These details can help you plan and consider how the charger’s position, your vehicle and your home’s electrical setup fit together.
Table of Contents
How much does it cost to install an EV charger at home?
Installation costs depend on the property, cable route and charger selected, which together determine the work and quotation. Home charging can be convenient, while public chargepoints remain useful when travelling or away from home.
Home Charger Models and Prices
Home wallboxes typically provide 3.7 kW to 22 kW, while a common 7 kW unit supports overnight charging. Smart models can manage charging, but the right choice depends on your vehicle’s charging capability and how you plan to use it. Installation prices vary by charger, cable length and electrical work, and are provided after a quote request.
To choose a suitable charger, match its power and connector to your car, then consider where the unit will go and how far the cable needs to reach. A professional assessment can review your home’s electrical setup and confirm a suitable option.
Standard Installation Requirements
A standard installation is based on the property’s electrical supply, consumer unit and route from the supply to the charger. UK home charger installations must comply with BS 7671 wiring regulations and Part P of the Building Regulations. Homeowners also need approval from their Distribution Network Operator before installation.
During installation, the electrician assesses the supply, fits the chargepoint and connects the necessary cables. In a flat or rented home, access to a suitable parking space and permission for the equipment and cable route can affect the work. Listed-building status may also affect equipment placement and external alterations, so include these details in the site assessment.
Grants and Eligibility
Grant support may help eligible applicants with the purchase and installation of a chargepoint. According to the UK Government, the grant covers up to 75% of the total costs of the purchase and installation of EV chargepoints (inclusive of VAT), capped at a maximum of £350 per socket. The grant is particularly relevant to renters considering a home charger.
The practical difference between public and home charging is access: a home unit lets you charge at your property, while public chargepoints serve journeys and destinations. Safety relies on correct installation and sound electrical connections; professional work must meet applicable wiring and building regulations. Keep the unit and cables in good condition, and arrange professional attention if you notice damage or a fault.
Cable length and connector types
A smart EV charger uses connected controls to manage charging rather than simply supplying power. It can coordinate charging settings, while your electric car’s onboard system also affects the actual charging rate.
Cable length depends on the route between the consumer unit and the chosen charger position. A typical installation quote includes 10-15 metres of cabling from the consumer unit to the charger. The standard installation price covers a 0-5m cable run between the charger and electricity meter. During a survey, engineers assess the route, access points and cable placement before confirming the installation plan.
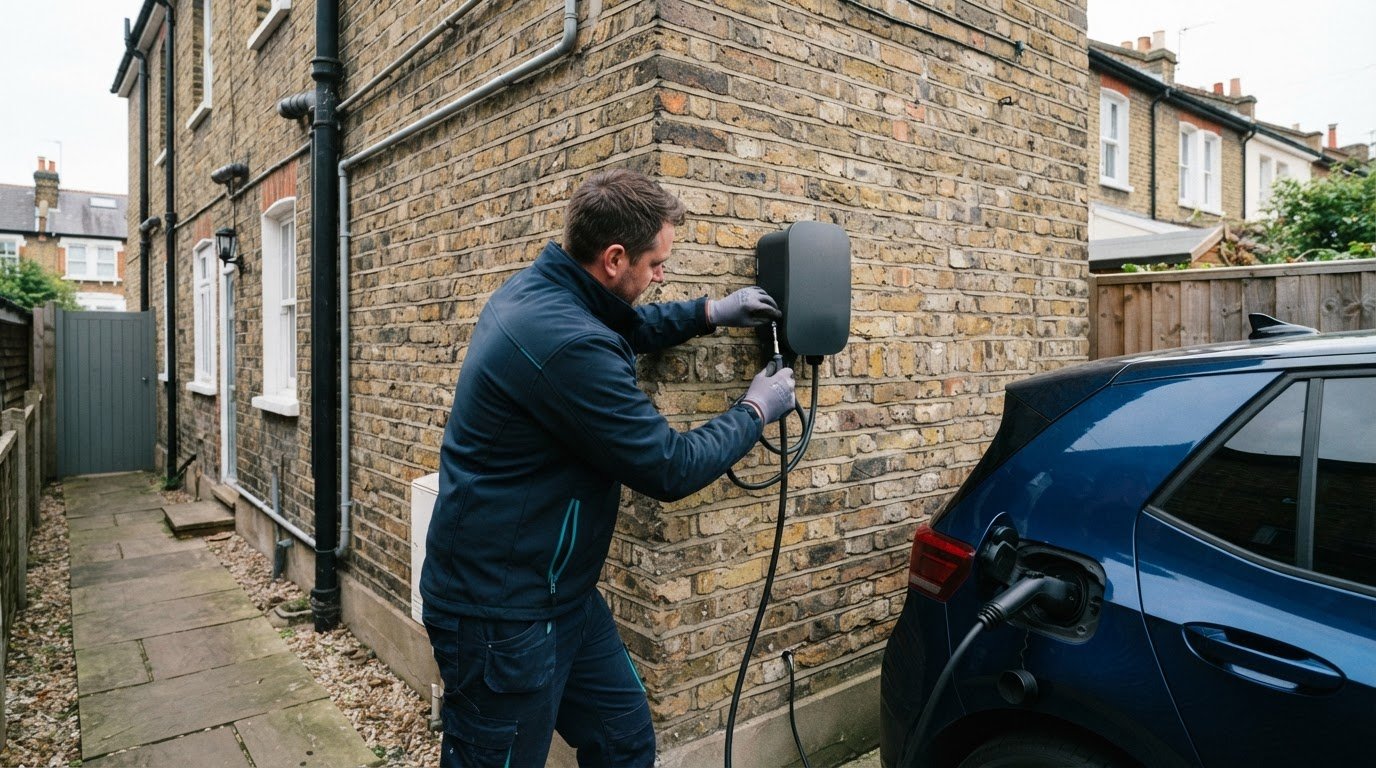
UK home chargepoints and other 7 kW connections on the road use Type 2 as the standard connector. Check the connector required by your car, then consider whether a tethered cable, attached to the charger, suits your parking routine. An untethered unit uses a separate cable, which can be stored when charging ends. Connector compatibility matters: the charging point and vehicle must connect correctly.
Connectivity affects how you manage a smart charger. Wi-Fi connects the unit to your home broadband, while GPRS uses a mobile network. The best option depends on signal strength where the charger will sit, for example, on a driveway beyond the router’s reach. During a survey, engineers can consider the connection alongside the cable route and charger position.
Off-peak tariffs can schedule charging for cheaper periods if the charger and tariff support timed operation. Compatible systems can also use available solar energy, although the amount depends on generation and household use. These settings help coordinate charging, but your car’s charging limit still affects the power it receives.
For a professional assessment of cable routes and charger placement, explore home charging installation options.
Installation process and appointment duration
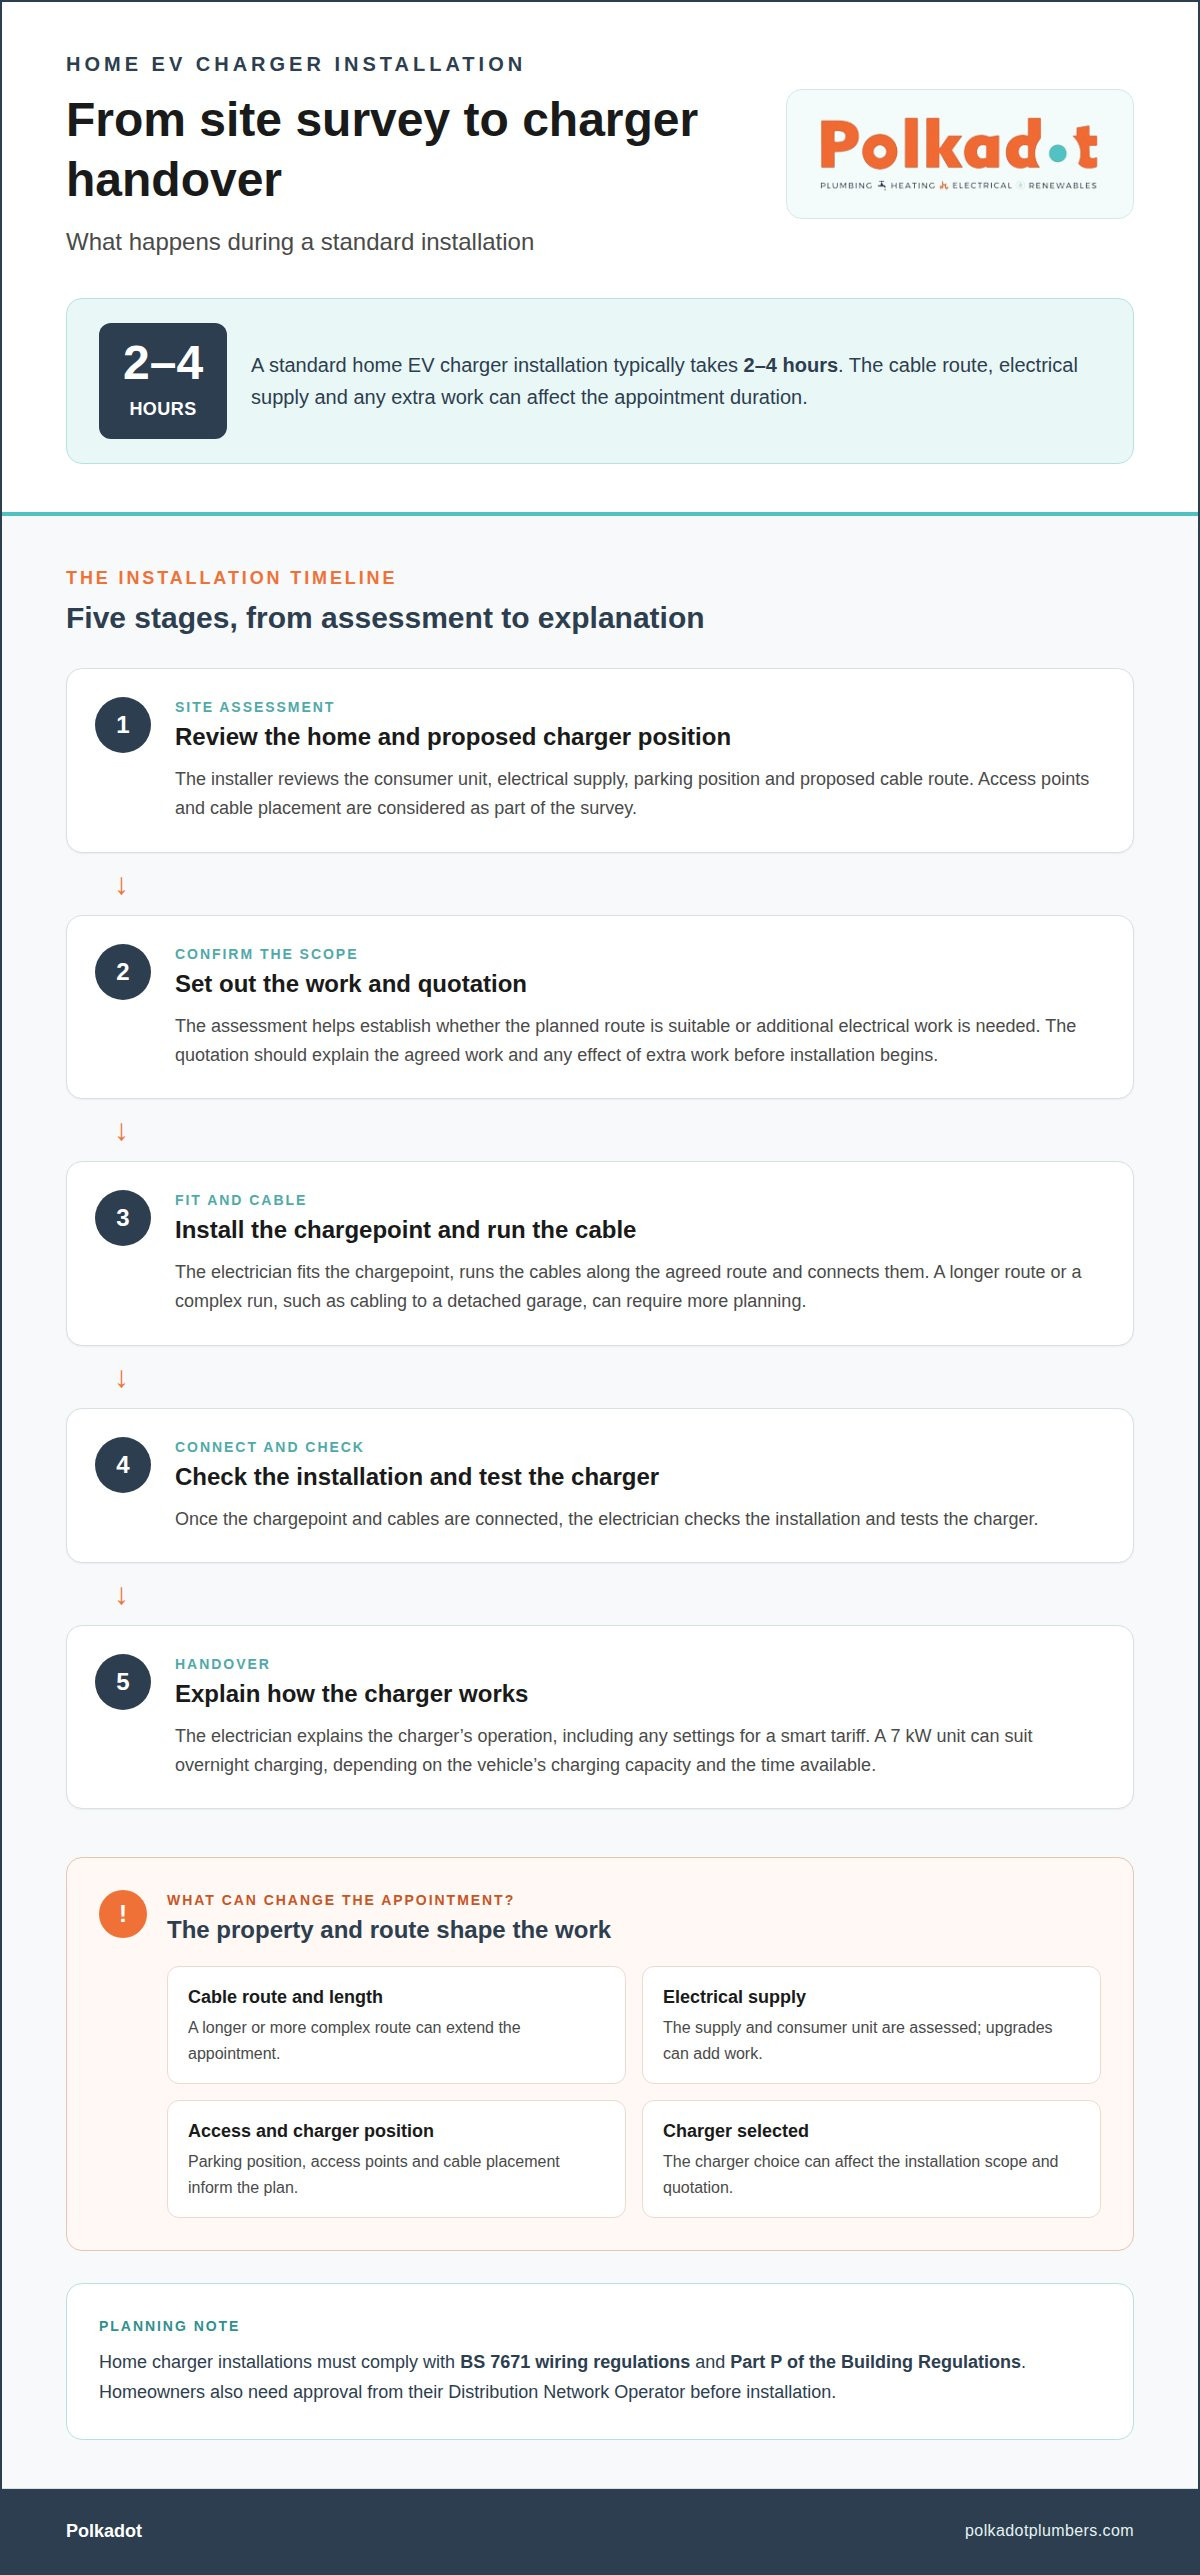
A standard home EV charger installation typically takes 2-4 hours. The cable route, electrical supply and any extra work affect the appointment and final quote.
Installation Steps
The professional process begins with a site assessment. The installer reviews the consumer unit, supply, parking position and proposed cable route, then confirms the work included in the quotation. This helps establish whether the installation can follow the planned route or requires additional electrical work.
During the appointment, the electrician fits the chargepoint, runs and connects the cables, and checks the installation. They then test the charger and explain its operation, including any settings for a smart tariff. A 7 kW unit can suit overnight charging, depending on the vehicle’s charging capacity and the time available.
A quotation should set out the agreed work and relevant site requirements, rather than assume every property is the same. Cable length, access, the consumer unit’s condition and the charger selected can all affect the scope. If the assessment identifies additional work, its effect on the quote should be clear before installation begins.
Appointment Duration and Cost Factors
Most standard installations take 2-4 hours, while a longer cable route or electrical upgrades can extend the appointment. The electrician’s assessment of the supply and charger location helps explain the expected work and duration. A complex route, such as cabling to a detached garage, can require more planning than a nearby wall-mounted unit.
For a grant application, applicants need a dated quote from 1 April 2026. Most UK home charging grant approvals are processed within 10 working days. The quote helps set out the purchase and installation costs used in the application; an eligible applicant should include the required dated document.
After installation, a smart charger can follow a tariff’s overnight charging period if its settings support scheduled charging. Any bill credit or tariff benefit depends on the energy supplier’s terms. The installer can explain the charger controls, but the tariff’s charging window and the vehicle’s charge limit determine how the schedule works in practice.
Product and workmanship warranties
The charger and its installation have separate warranty considerations. Check which components each document covers, how long the cover lasts and what steps to take if a fault occurs.
Charger Warranty Cover
Charger warranty cover relates to the unit itself, rather than the electrician’s fitting work. Some EV charger offers advertise up to 3 years of warranty cover. The manufacturer’s terms explain the covered faults, exclusions and claim process, so keep the product details and purchase documents together.
For example, a fault with a tethered cable may involve different product parts from a problem with the charger’s controls. The warranty document explains how those parts are covered. An EV charging problem can also come from the vehicle rather than the wall unit, so note when the fault appears and what the charger displays.
Installation Workmanship Warranty
Workmanship cover relates to the installation itself, such as fitting the unit and connecting its supply. It is separate from the manufacturer’s product warranty. Read the installation paperwork to understand what work is covered, for how long and how to report an installation-related concern.
A useful first step is to work out whether the issue relates to the equipment or the installation. For example, a charger that powers on but is awkwardly positioned in a driveway presents a different concern from a connection fault. Keeping a record of the installation date, charger model and reported issue helps explain the situation.
Keep both warranty documents with your vehicle and charger records, and note any maintenance or fault reports. Your usual charging routine, including overnight use, can help describe when an issue occurs, but it does not determine warranty eligibility. The written terms govern the cover.
For help with the electrical work involved in fitting a home chargepoint, discuss an electrical installation.
Polkadot: Electrical Installations
Polkadot provides Electrical Installations for homeowners planning a smart EV charger installation in London. Turn to the team when you’re ready to move from comparing charger options to arranging electrical work, or when your property’s supply and cable route need professional attention.
A clear picture of your setup helps shape the installation: note where the car is usually parked, your preferred charger position and cable arrangement. These details help plan the work around your home rather than treating every driveway or parking space alike. Polkadot also offers Heating, Air Conditioning and Refurbishment, but Electrical Installations are the relevant service for this charging project.
For a professional next step, contact Polkadot to discuss your home charger installation.
Make your home charging plan work for you
A smart EV charger installation lets you shape a charging routine around how your household uses its car. Before taking the next step, consider who will use the charger, where the vehicle is usually parked and whether your needs may change. These practical priorities can help turn technical choices into a setup that works smoothly in everyday life.
It also helps to consider the installation as part of your home’s wider electrical planning. If you’re considering other property work, keeping those plans in view can make it easier to discuss the right sequence and scope for the charging project. The aim is a considered decision, not simply choosing a unit and hoping it fits.
When you’re ready to discuss the work, get in touch with Polkadot about your EV charger installation. A clear next step can help you move towards convenient charging at home with confidence.
Frequently Asked Questions
What does a ‘standard installation’ include?
A standard installation usually includes fitting a home chargepoint and connecting it to the property’s electrical supply along an agreed cable route. The quote should clarify what work is included, such as the charger, labour and standard cabling. Changes to the consumer unit or extra work on the route can affect the scope. A site assessment helps identify these requirements before installation.
What is the difference between Type 1, Type 2, and CCS chargers?
Type 1 and Type 2 describe AC charging connectors, while CCS combines an AC connector with additional contacts for DC fast charging. Type 2 is the standard for UK home chargepoints, and many electric cars sold in Europe use Type 2 or CCS2. Check the connector inlet on your vehicle before choosing a chargepoint, as compatibility determines whether the cable connects directly.
Can I get a Workplace Charging Scheme grant for EV chargers?
Possibly, if the charging points are for an eligible workplace rather than a private home. The Workplace Charging Scheme is separate from home chargepoint support, so the relevant application depends on who owns or operates the premises and how the chargers will be used. A business considering staff or fleet charging should review the scheme’s eligibility requirements before budgeting for installation.
Can I get a second charger if I already have one?
A second charger may be possible, but the property’s electrical capacity, consumer unit and planned charger positions all affect the installation. For example, two parking bays may need separate cable routes or a coordinated charging arrangement. A professional assessment can establish whether the existing supply can support the extra equipment and what electrical work is needed before installation is scheduled.
Can I get the renters grant from the government?
Renters may be eligible for government support towards buying and installing a home chargepoint, subject to the grant’s criteria. According to the UK Government, the grant covers up to 75% of the total costs, inclusive of VAT, capped at £350 per socket. Eligibility depends on the applicant and property circumstances, so check that the grant applies before relying on it in your budget.
Can you charge an electric car at a normal socket?
Yes, a compatible charging cable can connect an electric car to a standard three-pin socket, but charging is slower than with a wallbox. A standard socket delivers 1.8-2.3 kW; charging a 60 kWh battery from empty to 80% takes about 22-24 hours. That can suit occasional top-ups, but drivers needing regular overnight charging may prefer a dedicated home chargepoint.
Comments